Creating Agents
Agents are created through a simple form where you define their identity, role, and behavior. Once launched — with task lists and skills properly configured — you can interact with them to perform tasks based on your defined task list using assigned skills.
How to Create an Agent
To create an AI agent, log into your organization and locate the AI Coworker section in the sidebar. Click the Add New button and fill out the form:
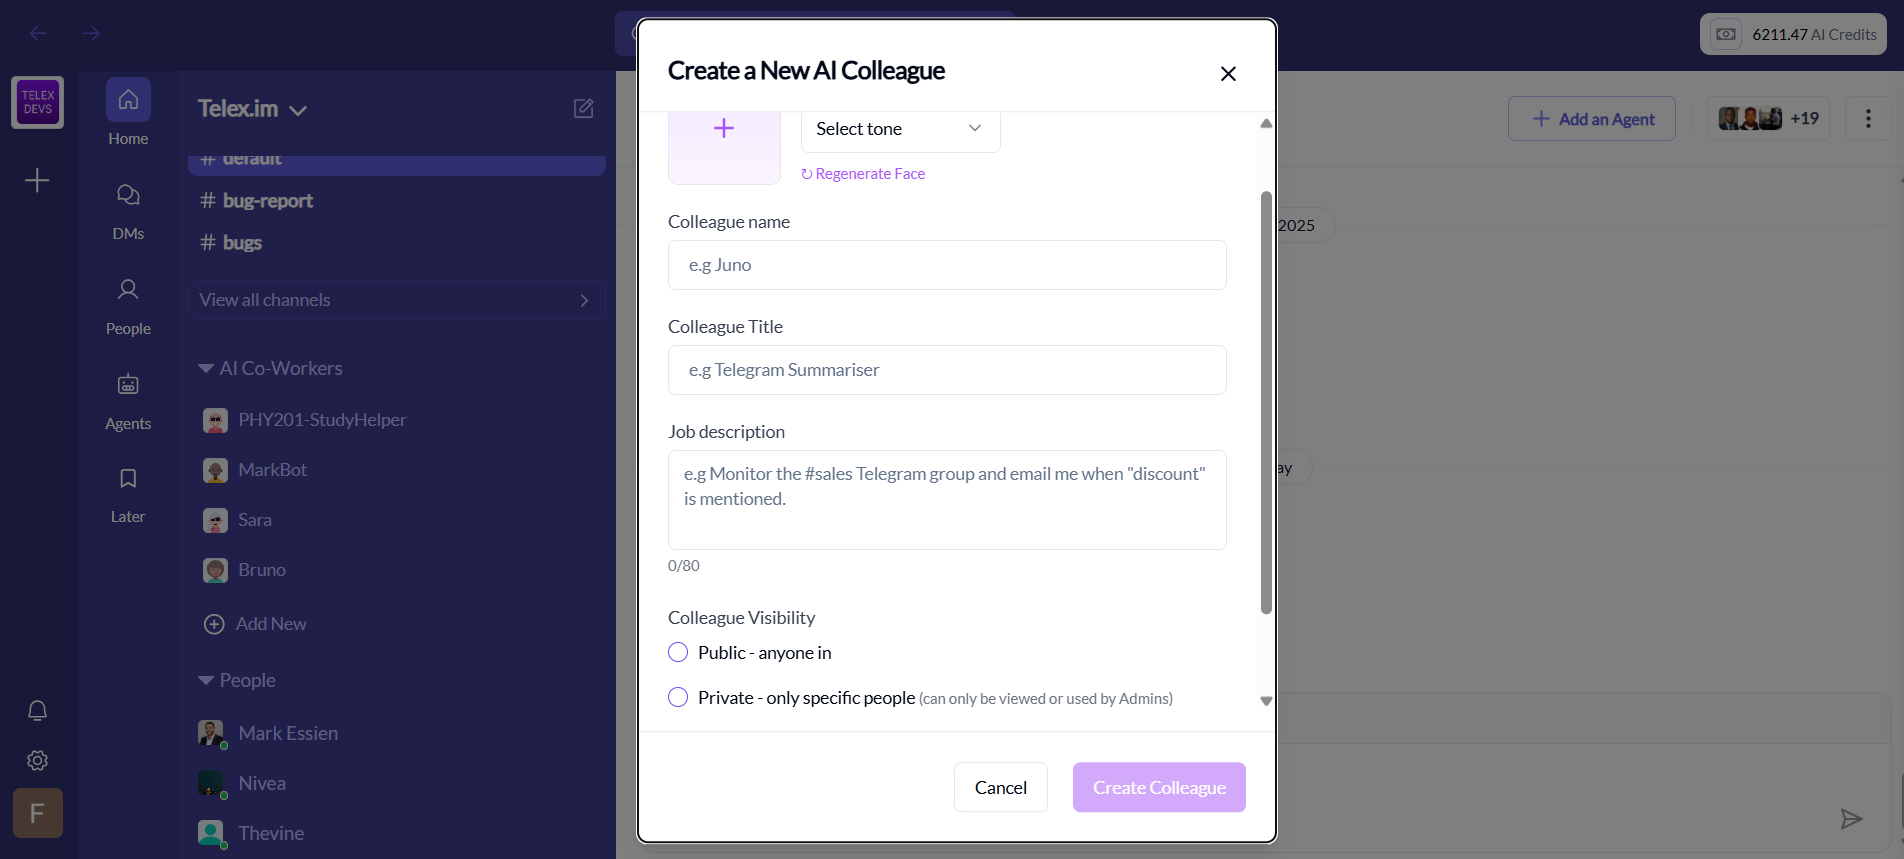
Steps:
1. Define the Agent’s Identity
- Colleague Name: A friendly name users will recognize
- Colleague Title: A short label describing its role (e.g. “Sales Monitor”)
2. Write the Job Description
This is a brief description of the agent’s role.
3. Choose a Tone
Select how the agent communicates:
- Friendly
- Formal
- Casual
4. Customize the Face (Optional)
Choose a visual avatar that matches your agent’s personality.
5. Set Visibility
Control who can use or view the agent:
- Public: Available to everyone in the workspace
- Private: Restricted to specific users or Admins
6. Click “Create Colleague”
Once submitted, Telex AI activates the agent which will be operating based on the job description you defined. At this point the agent will be available for chat based conversation but won't be able to perform any tasks yet. The next thing to do would be to configure the agent with a task list, a list of skills that will give him the capabilities to do the task and system prompt that will guide it's behaviour.
Next Steps
- Task List: Define what the agent should do
- Skills: Choose capabilities the agent will use to execute tasks
- JSON Workflow: Set a worlflow that connects with external systems like N8N tools and custom A2A systems like Mastra